
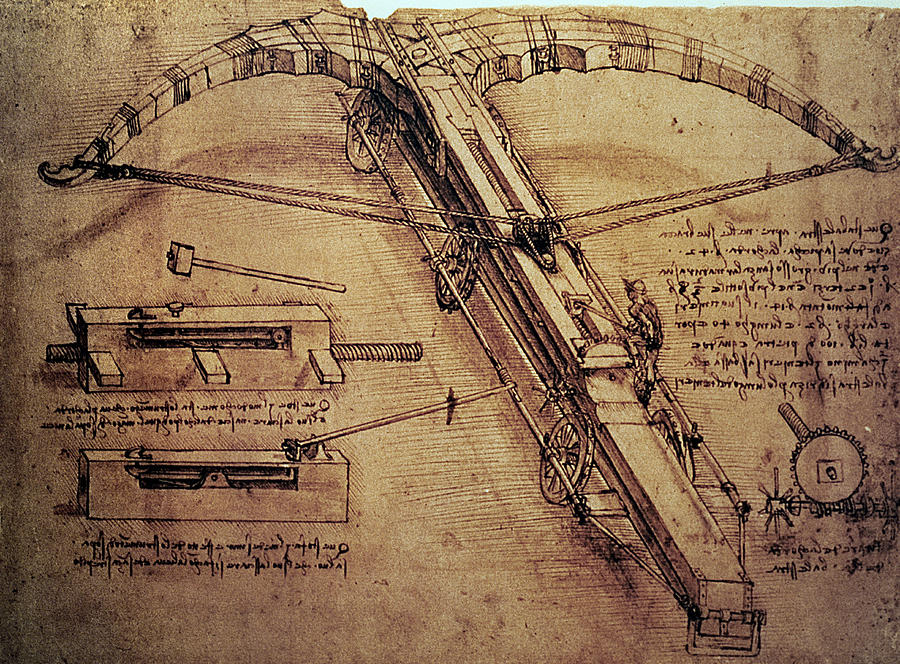
The first thing I did was get the body of the crossbow the right shape and proportions, so that when I started working on the rest of the crossbow, none of the other details were the wrong size. The main shaft was made of three boxes, one long one on the bottom, and two on the top. Once I had this, and got the shape correct on the curves at the back of the crossbow, it was time to work on the wheels. Making the wheel itself wasn't too difficult, I used a cylinder for the shape of the wheel and some boxes in the middle as well as another cylinder right in the center. Once I had one wheel done I could just clone it 5 more times and line them up in the right position.

The hardest bit to create was the top end of the crossbow, where all the action will be happening. Using the first picture as reference, I made the first part of it using a box and the bend tool, converting it to editable poly and moving the verteces around to get the desired shape. After I had this, I needed to create the top and bottom parts that connect to this, and I used a similar method of pulling the vertices to get the correct curve, and bending it to the same degree as the first bit plank.

Once I had this done, I started on the rope that is attatched from the rings at the end of the bow to the center, where it is pulled back in order to provide enough tension and power to force out the ammunition. To create the rope I used the hose and attatched one end to the ring, and the other to the pulling device in the middle of the bow. I did the same to the other side, and connected them both up using the select and link tool. Now, when I pull back the pulling bit, the rope stretches with it. I tried to make it so the wood at the end of the crossbow bends slightly when pulled back, but I couldn't manage to do figure out how that was done. There is still work to be done on the model when starting the animation, such as to get the wheels to move and the whole crossbow to have a weight and connect everything together, and have it so that it can fire objects out of the crossbow.

No comments:
Post a Comment